Quiz
If you want students to answer questions online, you can use the "Quiz" activity in Moodle.
Information on "Examining Students" from the Vice Rector for Academic Affairs: Digitales und hybrides Lehren und Prüfen (only available in German).
Before the quiz
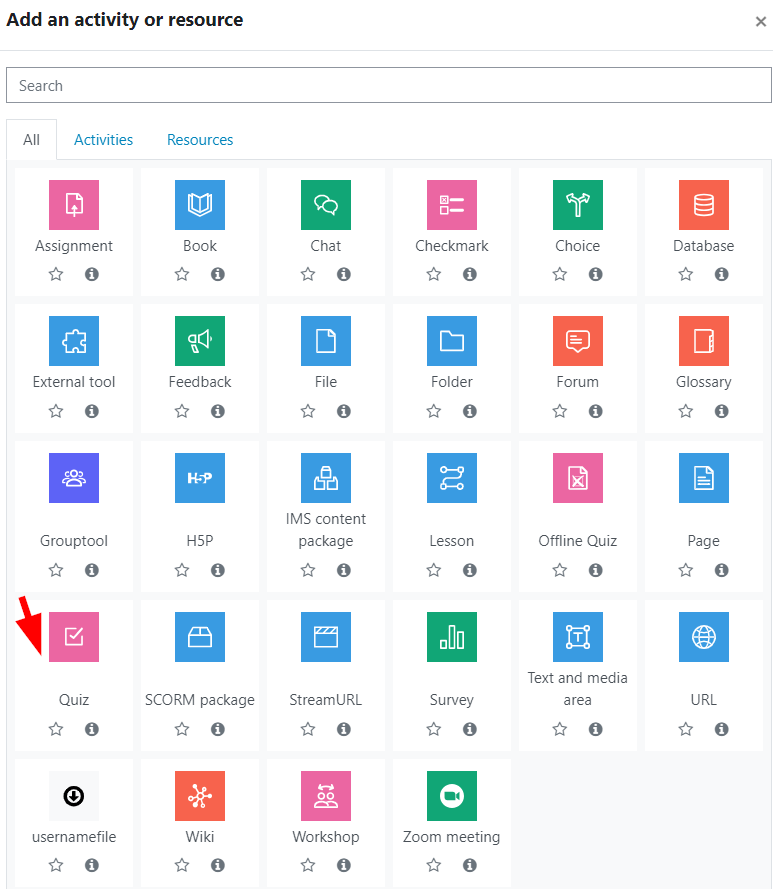
- In the desired Moodle course, click on "Add an activity or resource" in edit mode and select "Quiz".
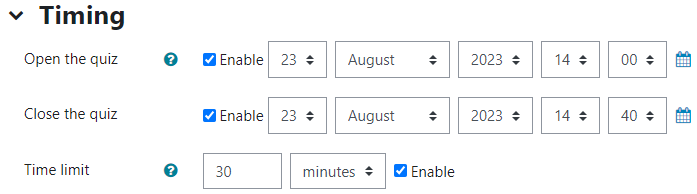
Enter a name and set the availability under "Timing".
The name must not contain a comma, otherwise the grades cannot be exported later.
The Time limit must be 10 minutes longer than the quiz duration due to phased access control.If you want to specify a period until the end of a day, please select 23:59 instead of 00:00 for better understanding.

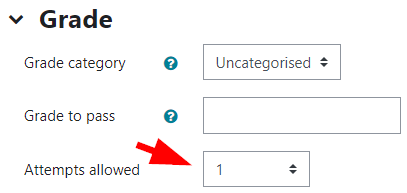
- In the "Grade" section, you can limit the number of attempts under "Attempts allowed" and, if necessary, define a suitable "Grading method" (which of the submitted attempts will be graded).
If you enter a "Grade to pass", this will also be visible to students on the quiz front page.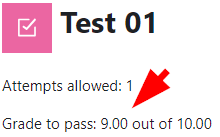
- In the "Review options" you can define which information students should see during or after an attempt.
At the bottom, click on "Save and return to course" or "Save and display".

Brief explanations can always be found on the blue "?". For help with further settings, see the question mark at the bottom right under "Help and documentation".
- After clicking on "Save and display", select "Add question".
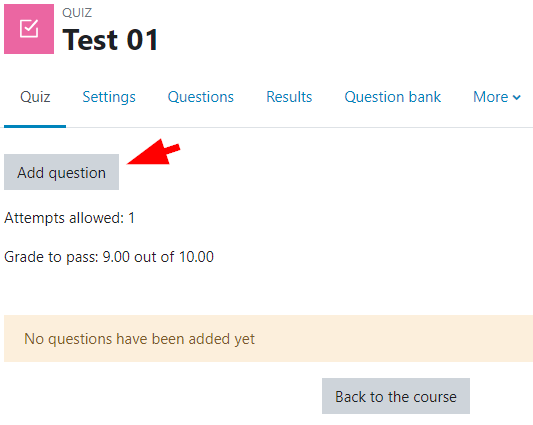
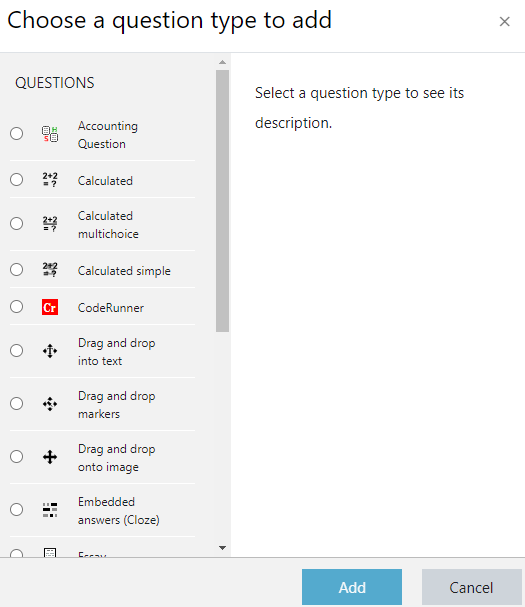
Then, use "Add" to either select existing questions "from question bank" or "a new question".
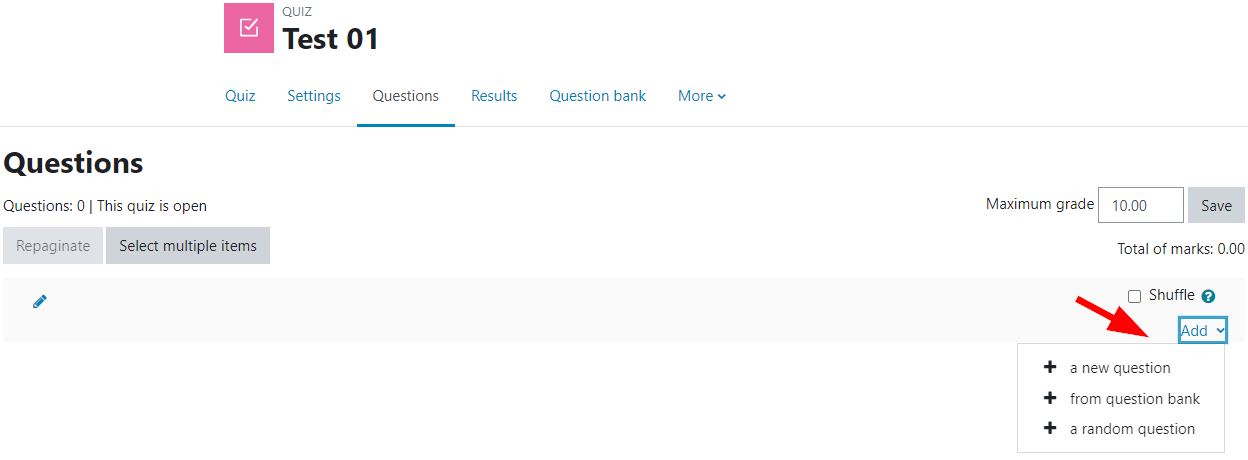
You can also click on "Question bank" in the menu bar when you have the quiz open and import questions or "Create new question ..." directly there.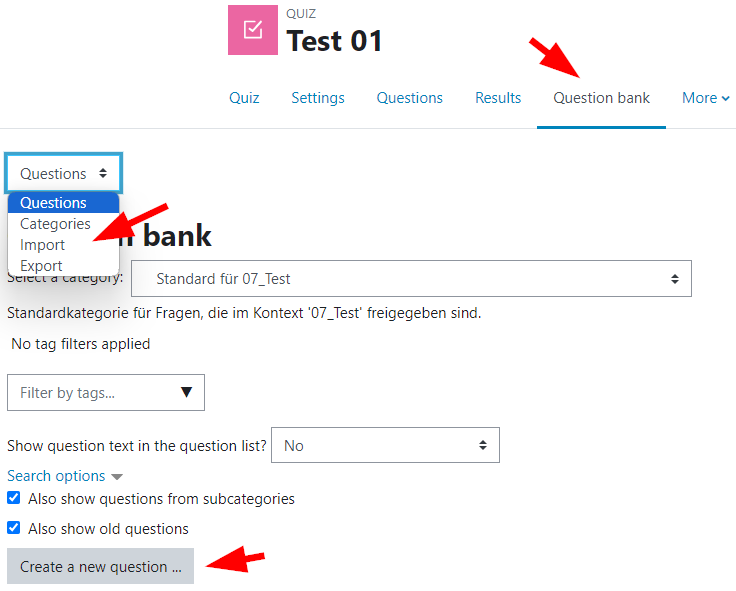
Default settings of quiz questions
If you create a new question and change a setting, this becomes the new default setting for you personally.
Example: You create a new "Multiple Choice" question and tick off "Shuffle the choices?". The next time you create a "Multiple choice" question, "Shuffle the choices?" is already unchecked at the beginning. The default settings only change for you and not for e.g. other teachers in the Moodle course.
If you have a quiz open, you can access the questions in the quiz via "Questions" at the top of the menu bar.
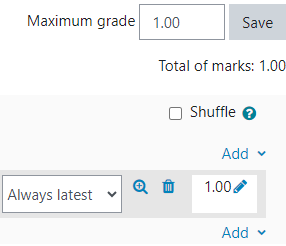
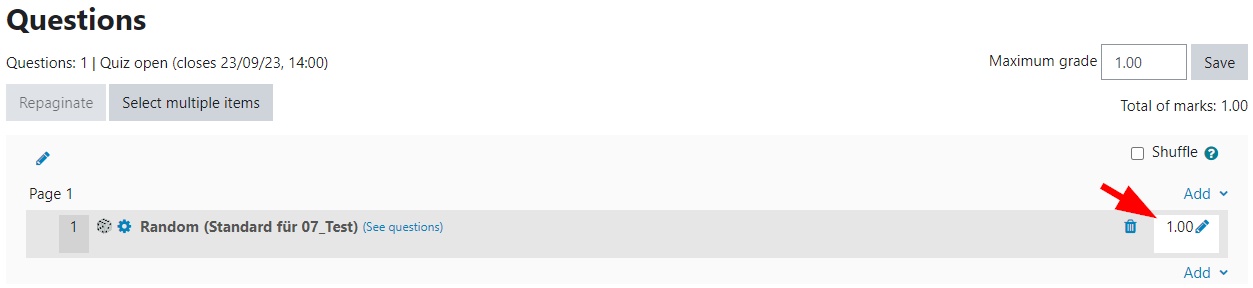
Different types of questions can be used in a quiz, e.g. essay questions and multiple choice questions.- The grading of the whole quiz is set under "Maximum grade". The grading of the individual questions can be set when creating the questions. However, it can also be determined differently in each quiz. To do this, click on the pencil next to the corresponding question.
If the "Total of marks" in a quiz and the "Maximum grade" are different (e.g. 15 questions á 1 point, Maximum grade: 10.00), the result is converted proportionally to the value defined under "Maximum grade".
If necessary, you can adjust the question numbering in your quiz as required.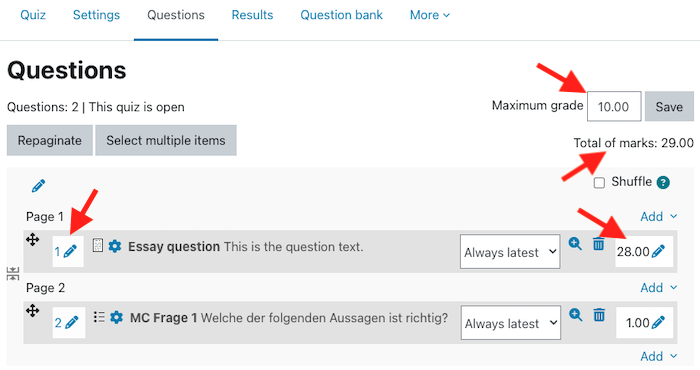
Quiz structure of graded exams
For graded exams, use the following structure:
- Close the quiz/Time limit: The quiz has be open for at least 10 minutes longer than the actual quiz duration. Example:
- If you schedule individual quizzes one after the other, then there should also be a 10-minute difference between quiz closure of the first quiz and quiz opening of the next quiz.
- Layout: One question per page

Depending on which phase of the quiz creation you make the above setting, make sure that there is also only one question per page in the "Questions" menu.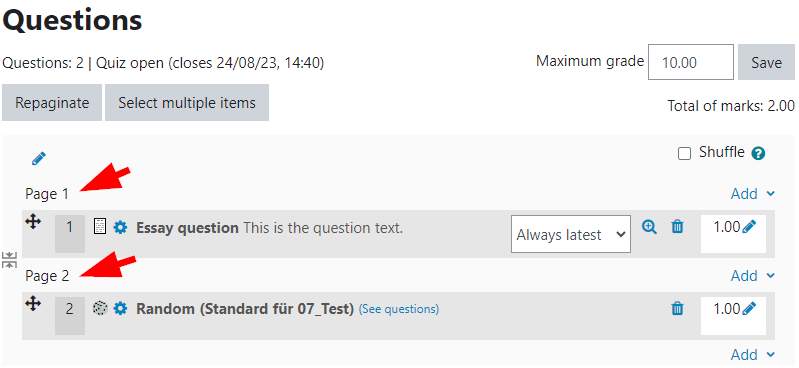
- These four question types have been pre-tested by us for exams:
- Multiple Choice
- True/False
- Numerical questions
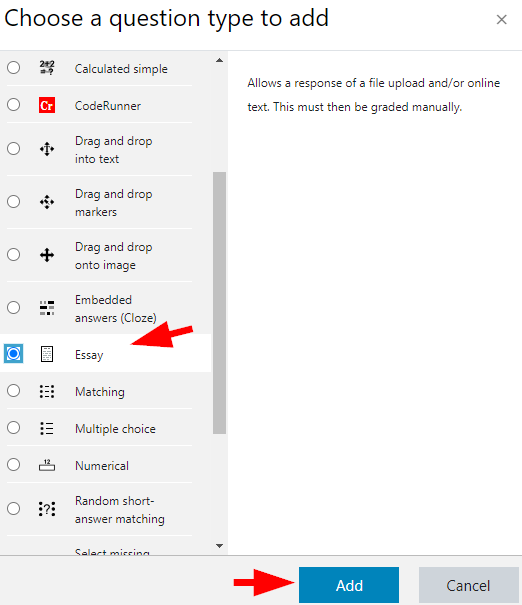
- Essay
Sample quizzes
We recommend that a Moodle quiz be made available in advance for students to take on a trial basis. In this way, students get to know how to use Moodle quizzes. In order not to burden resources, a sample quiz should be open for at least one day.
Notes that you please communicate to the students in advance
- Please do not log into Moodle shortly before the exam. Log in to Moodle already 10-15 minutes before the exam starts.
- If you experience technical problems during a quiz, please be patient and only reload the page every 10-15 seconds.
- A quiz in Moodle is not aborted if the internet connection is unstable. You can reload the page or close the browser and enter again. The time will continue to run. You can continue from the point when the last quiz was automatically saved in Moodle or when you clicked on "Next page".
- Timing (short example): 8:20 - 9:00 a.m.: In the Moodle course "000.000, test course, test person, 0000S", click on the activity "x. Exam". You have 30 minutes to answer the questions in the period until 9:00 am.
- In the course, click on "Edit mode" in the top right-hand corner, then on the right of the quiz to be copied click on
 and on "Duplicate".
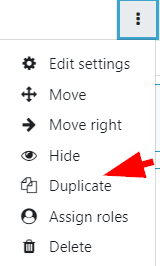
This creates a copy directly below the original quiz.
The questions contained in the original quiz are the same as those contained in the copy. This means that if the questions in the copied quiz are changed, this also happens in the original quiz.
If you want to change questions only for the new quiz, you can, for example, duplicate a question or simply create a new question. You can also control this by using a specific version.
- Create a quiz as described above.
- For example with the name "Statutory declaration" and in the description it can be stated that the exam can only be started after a successful submission.
- Under "Timing", use "Open the quiz" and "Close the quiz" to set the time period in which the statutory declaration can be submitted.
- After the quiz creation or after clicking on "Save and display" select "Add question".
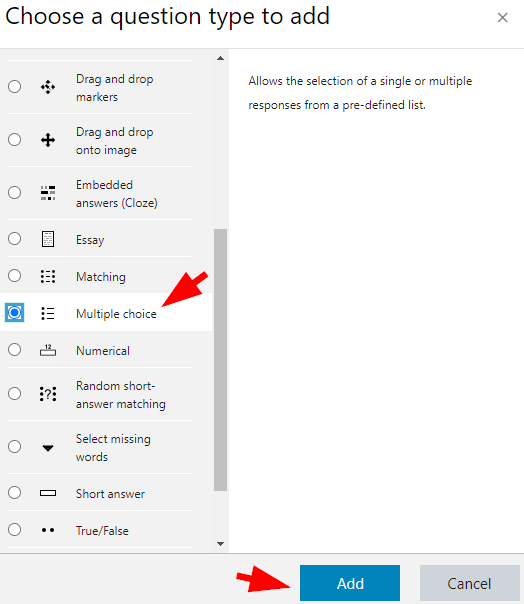
- Click on "Add " > "a new question" > "Multiple choice" > "Add".

- Now enter, for example, "Statutory declaration" as title and use the template provided by the Vice-Rectorate for Academic Affairs for the question text.
Templates can be found on the site Digitales und hybrides Lehren und Prüfen > Studierende prüfen > Abwicklung von schriftlichen online Prüfungen über Moodle und Zoom > Eidesstattliche Erklärung.
- Specify two possible answers. "Yes", should have a rating of "100%" and "No" should have "No" rating. You can then save the question.

- Adjust the rating on the right to the achievable points in the statutory declaration.
- Now go to the settings of the actual exam and select under "Restrict access" > "Add restriction" > "Grade".
- Under "Grade" select the quiz with the statutory declaration and indicate that this grade must be ≥ 100%. Only students who have answered "Yes" to the statutory declaration can take the exam.
- Please proceed as described in "Standard layout of a quiz".
- Stellen Sie unter "Bewertung" > "Erlaubte Versuche" auf 1.
- At step 7 please select the question type "Essay".
- Give the essay question a "Question name".
- Write a text under "Question text" and mark a place which should link to the information. Then click on the link symbol in the editor.

- Click on "Browse repositories...".
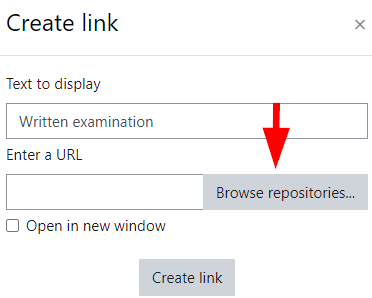
- Click on "Datei auswählen" to select a file via the menu familiar from your operating system. Upload the selected file by clicking on "Upload this file".
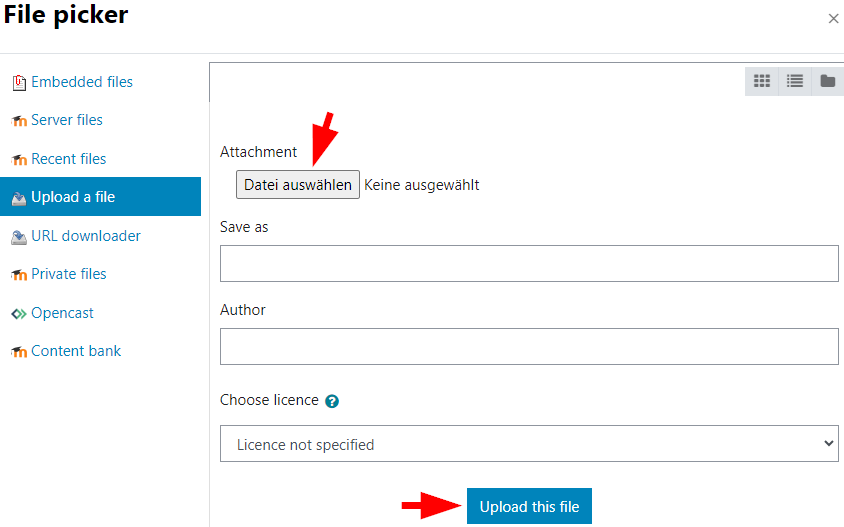
- You will now see the marked text passage as a link to the uploaded file.
- Make the following settings under "Response options":
- Response format: HTML editor with file picker
- Required text: Text input is optional
- Input box size: 15 lines
- Allow attachments > 1
- Required attachments > 1

- Optionally, under "Accepted file types" you can limit the file types for submission.
- Finally, click on "Save and edit" or "Save changes" to add the essay question to the quiz.
This is the view for students: Moodle courses
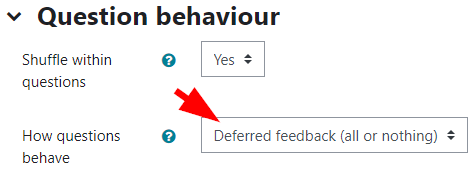
If you want points to be awarded for all question types, such as multiple choice, only if all correct answers are selected for a question, then set the question behaviour in the quiz settings to "Deferred feedback (all or nothing)".
Please set all incorrect answers to -100% so that no points are awarded for multiple choice questions if all correct answers and at least one incorrect answer have been marked.
Please note, once someone has made a submission on the quiz, it is no longer possible to change the question behaviour.
This is an additional plug-in, which is not developed by JKU Linz. Therefore, it cannot be guaranteed that it will not have to be deactivated with a Moodle update.
You use automatically assessed (e.g. multiple choice) and manually assessed (e.g. essay) question types in the activity "Quiz". In order for the students to see the overall result and the scores of the individual questions directly in the quiz activity only after the essay questions have also been scored, please proceed as follows:
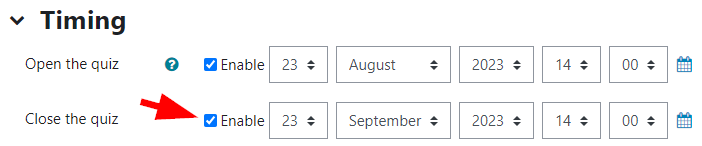
- When creating the quiz, it is necessary to activate "Close the quiz" under "Timing" and set a corresponding date. Students can take the quiz until this date.
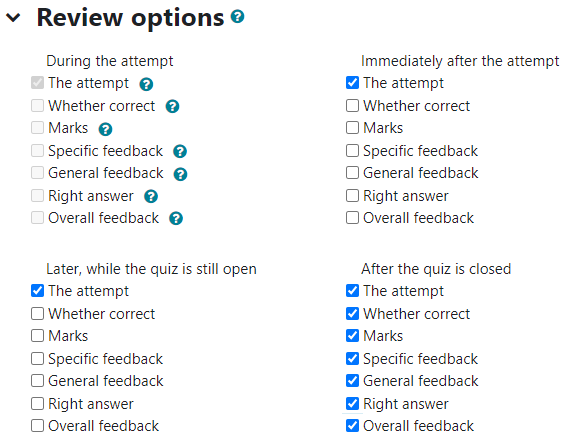
- Under "Review options", please tick off everything except "The attempt" in the first three columns. Except that students should not be able to see their answers after submission. In this case, please also tick off "The attempt" in the columns "Immediately after the attempt" and "Later, while quiz is still open". In the last column "After the quiz is finished" everything can be checked. This means that all results will be visible after the date specified in point 1. As the essay questions are to be graded first, a further step is necessary.
- Under "Restrict access" please click on "Add restriction" and select "Date". Now please set that each participant must fulfill the following condition:
Date until <Date and time entered when the quiz was closed>.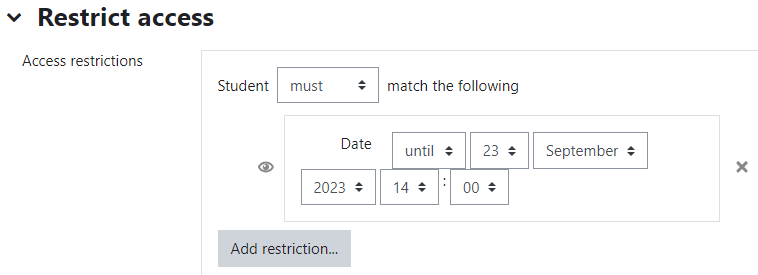
This means that students cannot access the activity after the quiz has been closed and therefore cannot see their results there (independent of the display on the menu bar under "Grades").
- Please grade all essay questions now.
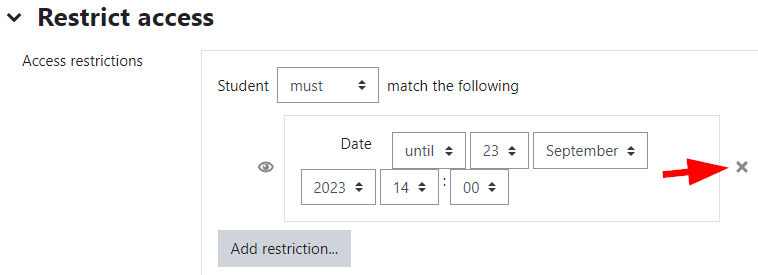
- When all students' assessments are complete and all results for this quiz can be published, please go to the quiz´s settings and remove the restriction by clicking on the "x" in the date line.
We recommend informing students about this procedure. They are usually accustomed to seeing the results right after the submission and on the other hand they are not used to not seeing their attempt for a while (between quiz closure and the removal of the restriction).
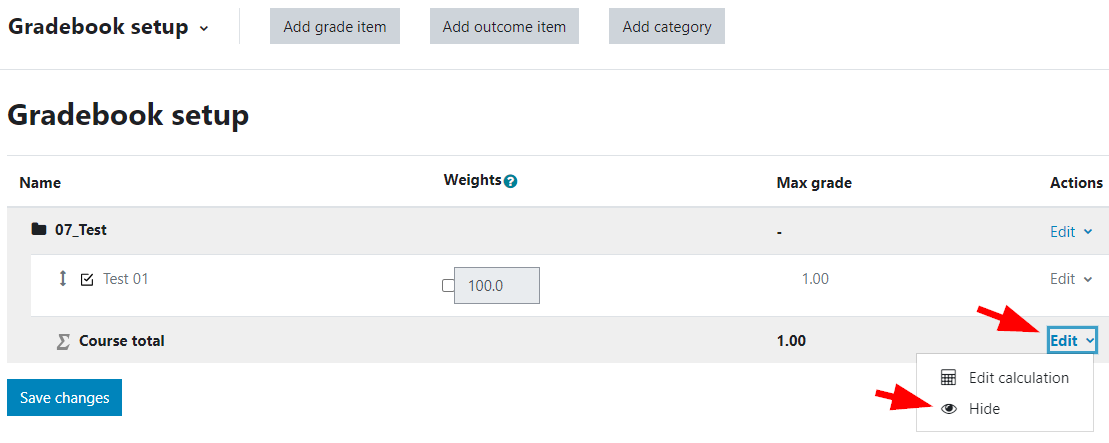
If you do not want the students to see a result in the "Grades" section of the menu bar, the activity must be manually set to "Hide" or later to "Show". In addition to that you have to click on "Edit" and then on "Hide" or later to "Show" in the "Gradebook setup" under "Course total".
Select the respective quiz. At the top of the menu bar under "More" select "Overrides". Click on the button "Add user override".
Select user(s). You can now change as desired for the individual student under "Open the quiz", "Close the quiz", "Time Limit" and "Attempts allowed".
Please note that the general quiz settings are also valid. Under "Settings" you can define the evaluation methods for several attempts in the category "Grade". As additional quiz attempts are defined according to an individual basis, you must also specify the grading method to be used (i.e. "Last attempt"). If no grading method is specified, the best score will be used.
If there are "User overrides", this is also visible for people with editing rights on the quiz front page.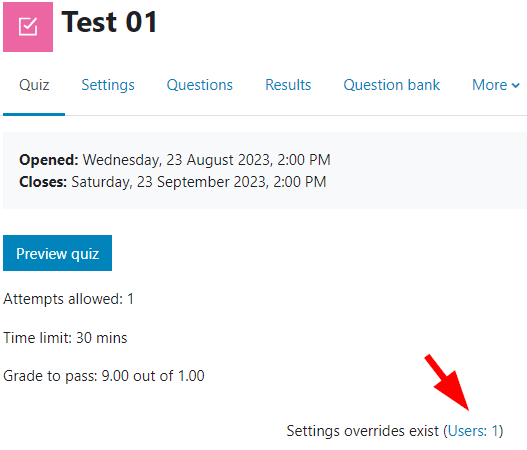
Moodle on YouTube: Quiz in Moodle
Prevent cheating
- Statutory declaration: An implementation option for the requirement of a statutory declaration can be found under "Before the quiz".
- Random questions: Informations are provided under "Question Types" > "Random questions".
To shuffle the questions in a quiz, check "Shuffle" under "Questions".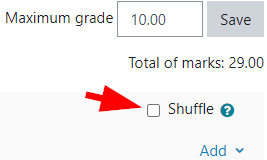
In the quiz settings, under "Layout", the navigation can be specified after clicking on "Show more ...". "Sequential" means that the quiz must be completed in a defined order. Pages cannot be repeated or skipped.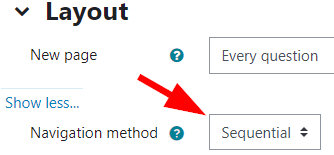
You can prevent copy & paste and force full screen mode:
- In the quiz, click on "Settings" at the top of the menu bar.
- Under "Extra restrictions on attempts" click on "Show more ...".
You can now select "Full screen pop-up with some JavaScript security" under "Browser security".
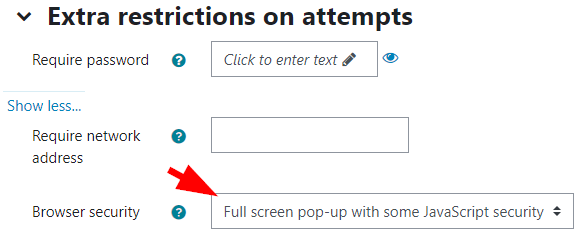
The quiz can only be started with activated Javascript and the quiz window will be opened in full screen mode without any options like copy & paste.
However, students can minimize the browser window and deactivate Javascript in the meantime.
Depending on the setting on the end device, this setting can lead to the error message "The requested URL /jku/mod/quiz/0 was not found on this server." after a successful quiz submission.
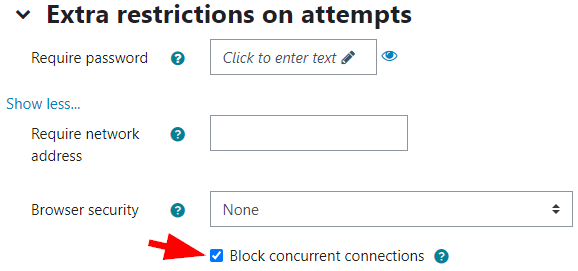
You can set that a quiz can only be continued in the same browser session. Any attempts to open the same quiz attempt using another computer, device or browser will be blocked.
- In the quiz, click on "Settings" at the top of the menu bar.
- Under "Extra restrictions on attempts" click on "Show more ...".
You can now tick "Block concurrent connections" under "Browser security".
Contact option
The students definitely need a way to contact you. For example, an email address that is checked during the quiz or a telephone number that can be called.
PC crash or browser closed unintentionally
If the PC crashes or the browser is closed unintentionally, a quiz attempt cannot simply be continued.
- In the quiz, click on "Results" at the top of the menu bar.

- Click on "Review attempt" for the student.
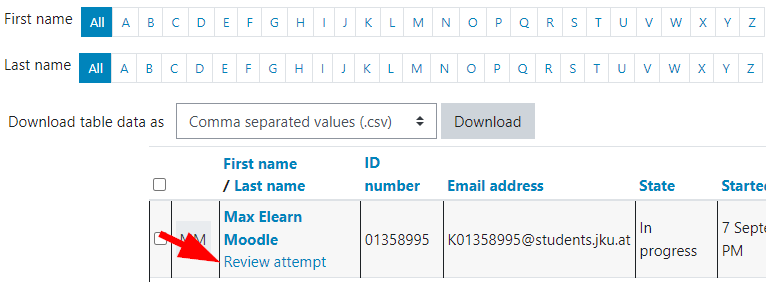
- Then show the blocks in the top right-hand corner and click on "Allow the student to continue this attempt using a different device" in the block "Block concurrent connections".
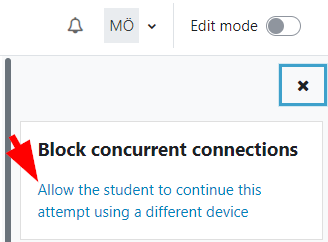
- This allows the test attempt to be continued again. Please note that the processing time continues in the background. It is best to make a user change for the student. Quiz > "Individual quiz settings for individual students".
Question types
If you use random questions in your quiz, all students receive random questions. No random exam that is the same for all students will be created. Questions must have been created before.
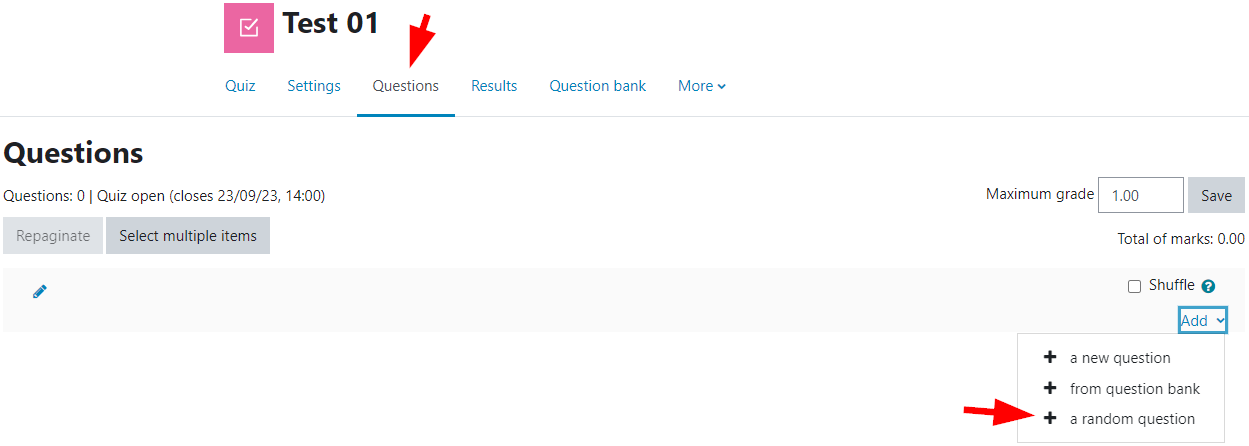
- Click on the quiz.
- Select "Questions" at the top of the menu bar.
- On the right under "Add" you can add a random question.
- Questions can be created on course level or structured by categories. Depending on whether the questions should be chosen randomly from the course area or a category, select the corresponding "Category".
You can filter again by only randomly selecting questions that have been marked with corresponding tags.
If you want to add several random questions to the quiz at once with these settings, you can do this with the corresponding number under "Number of random questions".
Below you can see how many questions meet these criteria and a list of the individual questions that could be randomly selected.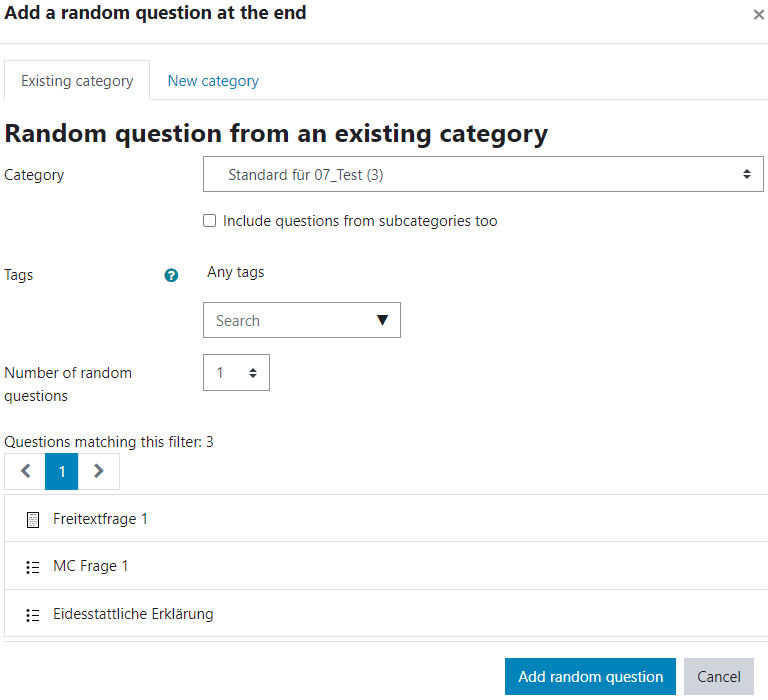
- Finally, click on "Add random question".
- In the case of random questions, the number of points given for each question is not used, but the number of points given for the quiz. The standard is 1 point.
No more random questions of a category or tag may be added than there are questions corresponding to it. For example, if there are 2 questions in the category, then a maximum of 2 random questions of the category may be added in the quiz. Otherwise, students will receive an error message. You can also check this by clicking "Preview quiz" in the quiz.
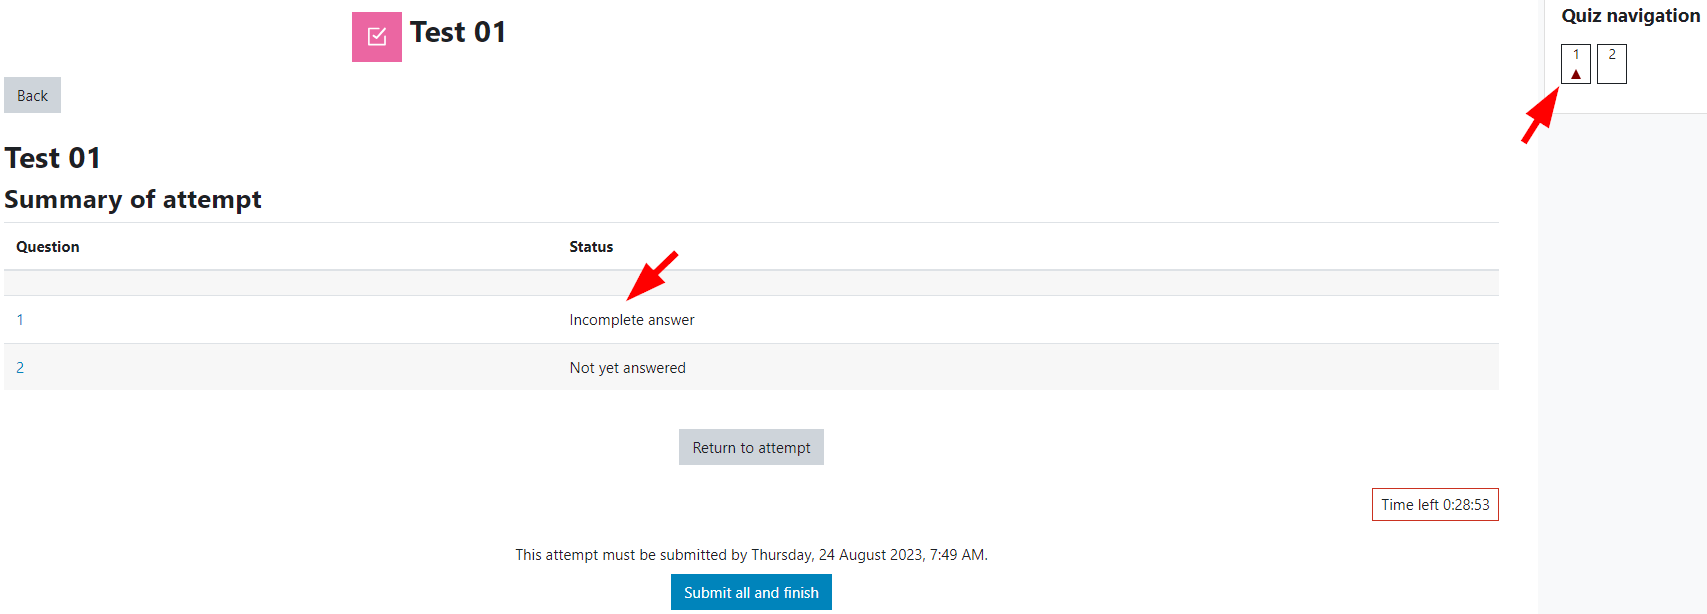
For essay questions, you can set a maximum and minimum number of words.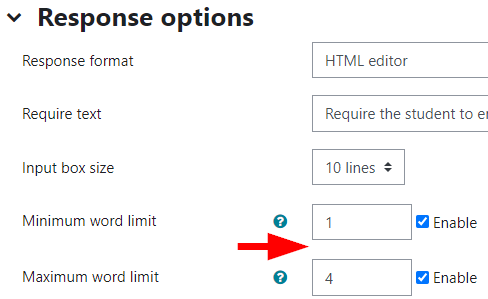
It is best to note these in the question text as well. If students enter more or fewer words, then this will only be visible during the quiz
- via an icon in the text navigation,
- directly before handing in or
- when they return to the question after saving (e.g. by clicking on "Next page").

During the quiz
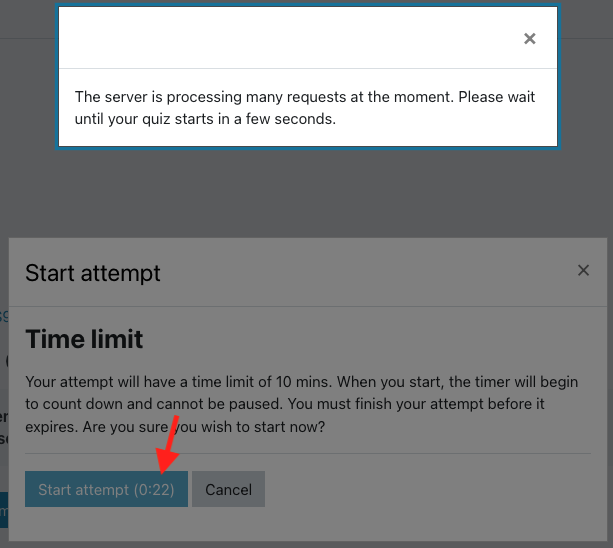
In order to better balance the load on Moodle, a phased access control is used in the "Quiz" activity.
Students click on "Attempt quiz" and "Start attempt". Depending on how many people on the entire Moodle want to start a quiz in one second, a timer may be displayed. After the timer has expired, the attempt is started automatically and the time for the quiz begins to run.
After the quiz
Answers per student
- Click on the quiz.
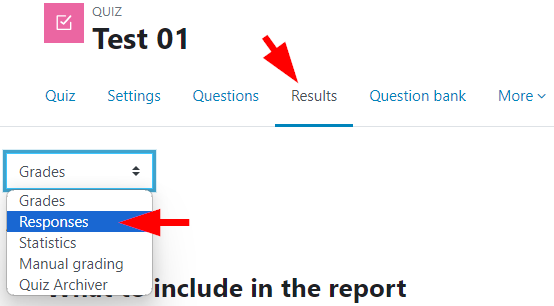
- Select "Results" in the menu bar, then click on "Grades" on the left and select "Responses".
Answers per question
- Click on the quiz.
- Select "Results" in the menu bar, then click on "Grades" on the left and select "Manuel grading".

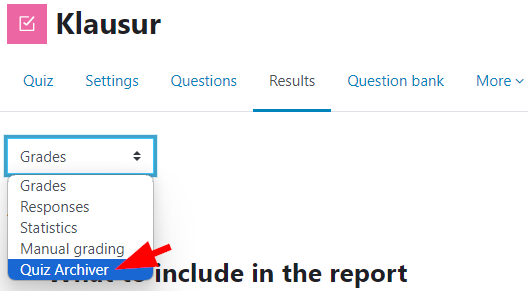
- Click on the quiz.
- Select "Results" in the menu bar below the course title, then click on "Grades" on the left and select "Quiz Archiver".
- You do not need to adjust the default settings and can click directly on "Archive quiz" at the bottom.
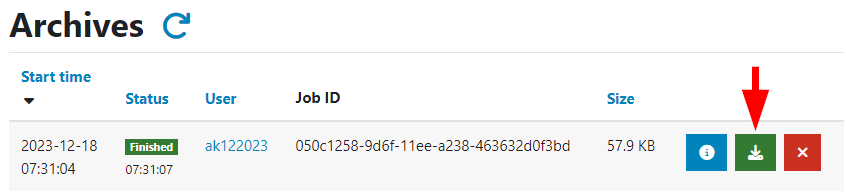
- This creates a new archiving job, which you can see under "Archives". Click on "Continue".
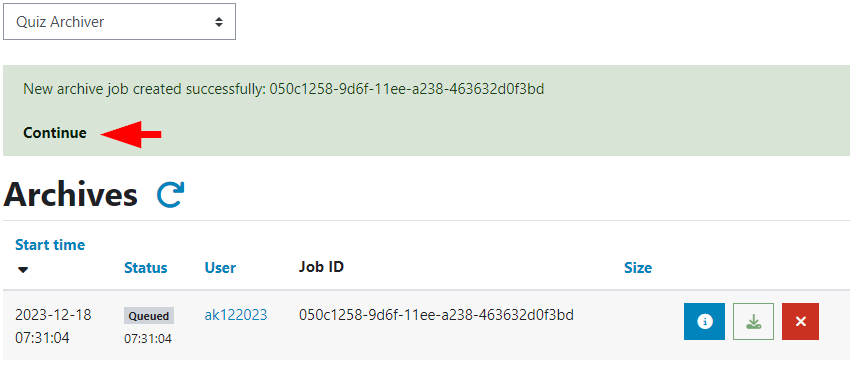
- As soon as the status changes to "Finished", you can download the archive by clicking on the Download button. Test archives are automatically deleted after 30 days. This only affects the archive created in Moodle and is independent of the individual quiz. Nevertheless, we ask you to delete the archive immediately after the download in order to save storage capacity.